Drill-Free Room Dividers: Steel and Glass Systems Explained
Planning a steel and glass room divider throws up three questions at once: what does your tenancy agreement actually allow, can your floor and ceiling handle the load, and which clamping system will hold the weight of glass reliably over years rather than weeks? This guide works through all three - with real technical figures - so you can make the right call before you open the configurator.
Renting in the UK: What Can You Actually Install Without Permission?
Tenancy Agreements and Structural Changes
Standard assured shorthold tenancy agreements in England and Wales prohibit making holes in walls, floors or ceilings without the landlord's written consent. Drilling even a small fixing into a ceiling technically constitutes an alteration to the fabric of the building - and most landlords will say no, especially in Victorian conversions or period properties where original plasterwork is involved. A drill-free room divider sidesteps this entirely. Floor-to-ceiling clamping systems that work on friction alone, and freestanding frames stabilised by their own weight, count as furniture rather than fixtures. They leave no trace and require no permission.
This matters to an enormous share of UK households. Around 35% of households in England rent privately (English Housing Survey, 2023), and in London that figure rises sharply - particularly in the converted Georgian and Victorian stock that dominates inner boroughs. For renters in these properties, a drill-free solution is not a compromise; it is often the only realistic option.
If you are in a listed building, it is worth dropping your landlord or freeholder a brief written note regardless - not because the law requires it for furniture, but because it protects you if questions are asked later. Clamping systems create no alteration to the structure, and a short email trail confirms that from the outset.
End of Tenancy: The True Cost Comparison
A fixed glass partition anchored with screws into a ceiling will cost you when you move out. Filling drill holes, re-plastering, and repainting the affected area typically runs to £250-£700 for a tradesperson, depending on the finish required and how many fixings were used. A drill-free steel-framed room divider can be dismantled by two people in under an hour with no damage to any surface and no tradespeople involved. The piece comes with you to your next flat - and if the ceiling height falls within a reasonable tolerance, it goes straight back up.
In an Edwardian conversion in Bristol, a 2,800 mm wide steel and glass room divider was fitted using a floor-to-ceiling spindle clamp system against a solid concrete ceiling, with no drilling at any point. When the tenant moved out, the whole unit came down in 40 minutes and was reinstalled in a new-build flat in Leeds the following weekend. No deposit deduction. No builder.
Listed Buildings and Period Conversions
Owners in listed buildings sometimes face restrictions on drilling that go beyond what a landlord might impose - local authority listed building consent can be required for even minor interventions. In these cases, a drill-free clamping system is not just convenient but necessary. Where original cornicing or decorative plasterwork runs along the ceiling line, bespoke packing profiles machined to match the profile depth allow the frame to sit flush and level without bearing directly against the plasterwork. This is only possible with a made-to-measure approach: a standard off-the-shelf product will simply not account for a 40 mm deep Victorian cornice running across the installation line.
Mobility as a Long-Term Asset
A drilled-in glass wall is effectively permanent - it has no value at a different address. A freestanding or clamped steel-framed room divider is a piece of furniture you own and can take with you. For people who move every two to three years - common in London and other major cities - that portability has genuine financial value. Quick-release spindle systems make seasonal assembly and disassembly realistic even in a holiday cottage or studio that changes configuration throughout the year.
Clamping or Freestanding: Which System Actually Holds the Glass?
How Floor-to-Ceiling Clamping Works
A floor-to-ceiling clamp system works on a straightforward mechanical principle. A threaded spindle sits inside the foot plate of the steel frame. When tightened, it pushes the frame upward against the ceiling while the base plate presses down against the floor. The friction created between these two contact points holds the frame in position - no fixings required. Properly engineered spindle systems work reliably at room heights up to 3,500 mm and are rated to hold steel frames carrying glass panels weighing 180-220 kg, provided the substrate beneath is solid.
That last condition is critical. The system depends entirely on the ceiling being able to resist the upward clamping force without deforming. Solid concrete, engineering brick, and dense timber joists can all handle this. Plasterboard cannot.
Why Plasterboard Ceilings Rule Out Clamping Systems
A significant number of UK properties - particularly 1930s semi-detached houses and post-war flats - have had plasterboard ceilings installed either as original construction or as later dry-lining over an older surface. Clamping systems exert several hundred newtons of upward force against the ceiling contact point. Plasterboard is not rated for this kind of concentrated load: it will flex, and in the worst case the spindle will push clean through, destroying the clamping surface entirely and bringing the frame down.
"Clamping systems designed for floor-to-ceiling installation are only reliable on solid substrates - reinforced concrete, solid masonry, or solid timber joists. On plasterboard or hollow ceiling constructions, they lose clamping effectiveness under dynamic load."
ift Rosenheim, Technical Guidance on Interior Glass Constructions, 2021 edition
Before ordering any floor-to-ceiling system, knock on your ceiling and listen. A solid, dull sound suggests concrete or dense plaster over masonry. A hollow sound means plasterboard, and you should consider a freestanding system instead.
Freestanding Frames: The Right Answer for Many British Homes
Where clamping is not an option - plasterboard ceilings, timber-joist floors with underfloor heating, or simply a preference for something truly moveable - a freestanding frame stabilised by its own weight is the correct technical solution. From around 120 kg of total frame and glass weight, combined with a base plate depth of at least 600 mm, a steel-framed room divider will stand without any ceiling contact at all.
In a converted warehouse apartment in Manchester, three freestanding glass panels (10 mm toughened glass, satin finish) were used to create a home office enclosure within an open-plan layout. Underfloor heating ran through the entire screed, making any floor drilling impossible and any clamped ceiling contact impractical given the exposed steel beam structure above. Wide-flange steel base plates (300 x 400 mm) on load-distribution pads solved both problems simultaneously - no drilling, no ceiling contact, fully stable.
Glass Thickness and Maximum Unsupported Height
Toughened safety glass (ESG to EN 12150) is self-supporting up to approximately 2,200 mm in height when used from 8 mm thickness upward. Beyond that height, the bending stress on the glass edge exceeds safe limits and you need either laminated safety glass (VSG) or a fully braced steel frame that takes the structural load away from the glass itself. This is not a guideline - it follows directly from the bending tensile strength of toughened glass and the geometry of the panel. In the UK, where Victorian and Georgian ceiling heights of 2,800-3,200 mm are common in older terraced houses and conversions, this boundary is crossed regularly. For any panel above 2,200 mm, VSG or a fully engineered steel frame is the only appropriate specification.

Floors, Ceilings and Load: What Your Substrate Needs to Handle
Point Loads and Why They Catch People Out
A steel and glass room divider measuring 3,000 mm wide by 2,400 mm tall will weigh somewhere between 180 and 220 kg depending on glass thickness and frame profile. That weight does not spread itself evenly across the floor - it concentrates at the two foot plates. Two plates at 300 x 400 mm each, carrying 200 kg between them, generate a point load of around 83 kg per plate. On a concrete floor, that is entirely unremarkable. On a floating timber floor over underfloor heating - common in UK new-build flats - it is a figure worth checking before installation, not after.
The most frequently overlooked risk with freestanding glass partitions is not the glass itself but the floor's ability to handle concentrated point loading from the feet. This is worth verifying with a structural engineer if you have any doubt about the construction beneath your floor finish.
Timber Joist Ceilings in Period Properties
Victorian and Edwardian properties almost universally have timber joist ceilings rather than concrete soffits. These typically carry a rated imposed load of 150-200 kg/m² - which sounds generous until you calculate what a clamp foot actually does. A 300 x 400 mm base plate concentrated with 100 kg of clamping force produces a local bearing pressure of roughly 833 kg/m², far exceeding what a timber joist can safely accept at a single point between supports. The practical answer in a period terrace is usually a freestanding frame, or a ceiling-contact system where the spindle head lands directly over a joist - identified with a stud finder before positioning.
Underfloor Heating and Load Distribution Plates
Screed floors with underfloor heating present a second specific challenge. Expansion joints within the screed must not be bridged or loaded by a clamp foot, as concentrated pressure across a joint causes cracking. The standard solution is a 6 mm steel load-distribution plate - typically 500 x 500 mm - placed between the foot plate and the screed surface. This spreads the point load across 0.25 m², reducing local bearing pressure to a level the screed can comfortably handle, and avoids any bridging of joints. It is a small detail that prevents a significant repair bill.
Thermal Movement and Clamp Maintenance
Concrete ceilings expand and contract with temperature changes. Over a full heating season, ceiling height can vary by 1-3 mm - invisible to the eye but significant to a system relying on friction to stay put. Budget spindle systems designed for curtain poles or lightweight room dividers will lose grip entirely when this happens. Quality systems with adjustable threaded spindles compensate for this movement - but they require one re-tightening visit roughly 6-8 weeks after the first full heating cycle. During that initial run-in period, clamping systems typically lose up to 15% of their original clamp force through a combination of material settling and thermal movement. One tightening appointment sorts it; after that, an annual visual check is all that is needed.
Fitting Your Room Divider Without a Tradesperson
Measuring Correctly Before You Configure
The most common reason a custom piece does not fit is incorrect measurement, not a production error. Room height must be taken at a minimum of three points along the intended installation line - left, centre, and right. In a Victorian terrace, differences of 8-12 mm between these points are not unusual; in a 1930s semi they can be even more pronounced. Any variation over 5 mm needs to be noted and communicated, because a made-to-measure frame accounts for this in the specification - a standard product does not.
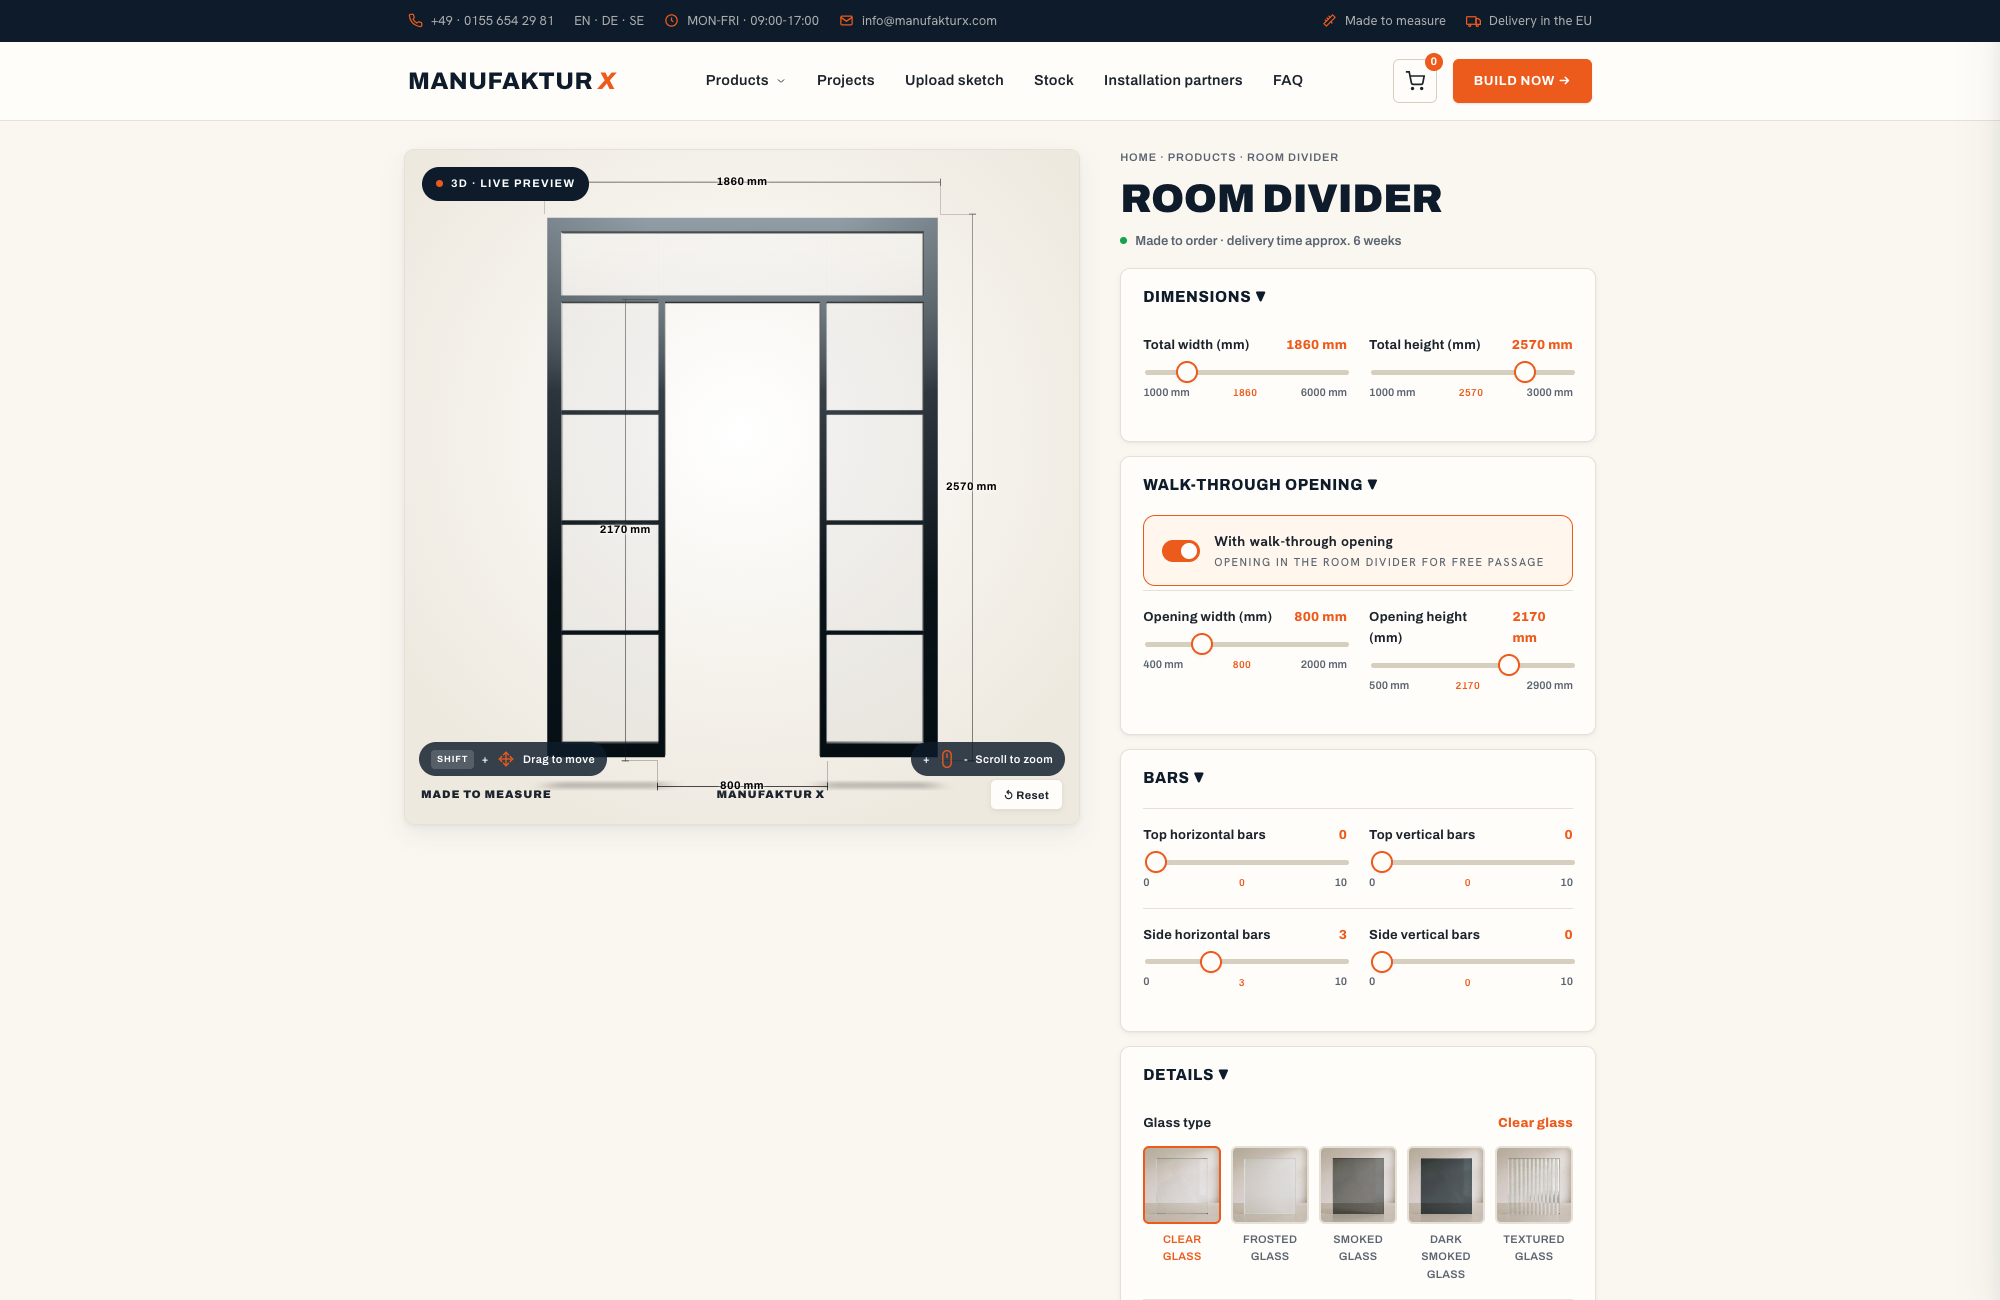
At Manufaktur X, you enter your exact desired dimensions directly into the 3D configurator. There is no guesswork about construction openings or tolerance allowances - what you input is what gets made. Photograph the installation position clearly, including any skirting boards, radiators, or expansion joints in the floor, and note which direction the ceiling surface falls.
- Measure room height at three points (left, centre, right) - note any variation over 5 mm
- Identify the ceiling substrate: solid concrete, plasterboard, or timber joists
- Record skirting board height, radiator positions, and any expansion joints in the floor
- Photograph the full installation area, including cornicing, beams, or ceiling drops
Installation Sequence for Clamping Systems
The order of assembly matters and should not be varied. Position the steel frame - without glass - at the intended location first. Use a 2-metre spirit level to check plumb in both axes. Any deviation greater than 2 mm per metre will eventually create stress concentrations in the glass. Once the frame is confirmed plumb, tighten the spindles evenly to approximately 15-20 Nm. Recheck plumb immediately afterwards - tightening the spindles can introduce a small shift. Only once plumb is confirmed again should the glass be introduced into the frame.
Handling the Glass: Weight, Tools and Sealing
A toughened glass panel measuring 1,000 mm x 2,000 mm at 10 mm thickness weighs approximately 25 kg. That sounds manageable - and it is, with the right equipment. Without vacuum lifting cups rated to at least 80 kg, guiding a panel of this size into a steel frame without catching the edge is genuinely difficult. Edge damage is the leading cause of glass failure after installation. Two people and a glass lifter are not optional extras; they are the minimum safe requirement. Equally non-negotiable is the EPDM or silicone gasket between the glass edge and the steel frame. Direct metal-to-glass contact generates micro-vibration and stress concentrations that will degrade the glass over time - and in toughened glass with nickel sulphide inclusions, those stresses can trigger spontaneous breakage without warning.
"Toughened safety glass must never be installed in a metal frame without an elastic intermediate profile. Direct contact creates stress peaks that can lead to spontaneous fracture under thermal loading."
Glass and Glazing Federation, Technical Guidance on Domestic Glass Installations, UK edition
Leave the protective film on the glass until the frame is fully assembled and the area is clear of tools. Scratches from frame contact during fitting are far more common than scratches in use.
Post-Installation Checks and the Six-Week Return Visit
Once the glass is in place, test lateral stability by placing both hands at the top of the frame and applying around 30 kg of sideways pressure. Movement of more than 5 mm means the spindles need tightening and plumb needs rechecking. Mark your calendar for a return visit at six to eight weeks - after the first heating cycle has put the clamping system through its initial thermal range. That one follow-up tighten is all the maintenance the system will need; from then on, a quick annual visual inspection is enough.
Choosing Your Glass: Toughened, Laminated, Clear or Satin
Toughened Glass as the Standard Choice Below 2,200 mm
For room dividers up to 2,200 mm in height, toughened safety glass to EN 12150 is the appropriate default. Its bending tensile strength - roughly four times that of standard float glass - is more than adequate for the loads involved in a domestic or light commercial partition. In the event of breakage, toughened glass fractures into small blunt-edged fragments rather than sharp shards. From 8 mm thickness it is self-supporting within standard frame spans. Panels at 10 mm are worth specifying for larger formats, both for rigidity and for the quieter acoustic character of the heavier glass. A 10 mm toughened panel at 1,200 mm x 2,200 mm weighs approximately 30 kg - factor that into your installation planning from the start.
When Laminated Glass Is Worth the Premium
Laminated safety glass (VSG) bonds two or more glass layers through a PVB interlayer. When it breaks, the interlayer holds the fragments in place - the panel cracks but stays in position. For any panel over 2,200 mm tall, VSG is the technically correct choice. It also offers meaningfully better acoustic performance: a VSG 6/6 mm panel achieves a sound reduction index (Rw) of around 42 dB, compared with approximately 35 dB for 10 mm toughened glass. That 7 dB gap is audible in practice - roughly the difference between a solid internal door and a lightweight hollow-core one. For a home office partition in an open-plan flat, or for separating a sleeping area in a studio, that difference matters. The premium over toughened glass runs to roughly 20-35% depending on panel size and specification.
Clear Glass vs. Satin: Everyday Reality
Clear glass keeps a space feeling open and maximises light transmission - but it shows every fingerprint and every smear immediately, on both sides. Satin (sandblasted) glass diffuses light evenly, provides privacy without full opacity, and is considerably easier to keep looking presentable day to day. For a bedroom partition or a home office screen in a Victorian terrace, satin almost always proves the more satisfying long-term choice. Clear glass makes sense where the architectural effect depends on full transparency - in a compact studio flat, for example, where a partition must not visually reduce the sense of space.
Glass type, frame profile, and powder-coat colour can all be previewed and priced in real time using the Manufaktur X room divider configurator before any commitment is made. You see exactly what you are ordering - and exactly what it costs.
The Gasket Is Not Optional
Regardless of whether you choose toughened or laminated glass, clear or satin, the elastic gasket between glass and steel frame is a structural requirement, not a finishing detail. Without it, thermal expansion causes stress concentrations at the glass edge that toughened glass - with its residual internal stresses - can translate into spontaneous fracture. EPDM or silicone profiles at Shore hardness 60-70 are the standard specification: they absorb micro-vibration, accommodate minor dimensional variation between the glass panel and the frame rebate, and prevent direct metal contact at every point around the perimeter.

What Does a Drill-Free Room Divider Actually Cost?
Off-the-Shelf vs. Made to Measure
Tension rod systems and lightweight clamping frames from DIY retailers or online marketplaces are available from roughly £60-£200. These products are engineered for curtain poles, shower screens, and decorative panels - not for toughened glass panels weighing 20-40 kg. The clamp mechanisms are not dimensioned for sustained loads of this kind, and the spindle materials are not rated for years of continuous clamping stress. The difference in engineering quality is not marginal.
A made-to-measure steel-framed room divider from Manufaktur X - 4 mm raw steel section, powder-coated in any RAL colour, 8 mm toughened glass, drill-free clamping system - starts from £845. That price covers fabrication to your exact specified dimensions: no trimming on site, no gaps where a standard size does not quite reach a wall. A wall that is out of square by just 3 degrees produces a ceiling gap of over 12 cm at 2,400 mm height when a standard-width panel is used. Made-to-measure eliminates that problem by design.
Every room divider is manufactured in the EU and delivered to the UK with all customs duties and import costs handled. Production takes 5-6 weeks from order confirmation - a fixed lead time with no surprises.
Understanding Price Differences: Glass Specification and Colour
Upgrading from toughened to laminated glass adds roughly 20-35% to the glass element of the price, depending on panel size and layup. RAL standard colours within the powder-coat range are included as standard; certain specialist finishes carry a small supplement. The 3D configurator on the product page shows your exact price in real time as you adjust dimensions, glass type, and frame colour - so there are no hidden costs to discover at checkout.
If you are unsure whether your ceiling substrate supports a clamping system, or whether your floor specification can handle the point loads involved, the Manufaktur X team can provide a technical first assessment before you commit to a configuration. It is a straightforward conversation that can save a significant amount of trouble later.